Category: Tutorial

  • How to apply a Smart Profile

    How to apply a Smart Profile

    Before you start, you’ll need either ZenDeck 0.1.6.5 or higher or the standalone Smart Profiles app v1.0.14 or higher installed on your device.

    You can download them from:

    zendeck.app β†’

    πŸ’‘ Recommended experience

    For the best console-like experience, we recommend using ZenDeck. ZenDeck can apply Smart Profiles and also manage supported device-side settings when launching your games, such as resolution, GPU options, and other device configuration automatically.

    Apply a Smart Profile from the website

    This is the recommended and easiest way to apply a Smart Profile.

    After installing ZenDeck or the standalone Smart Profiles app, you can visit the page of any available Smart Profile and click the Apply Profile button.

    ZenDeck Smart Profile page for Cyberpunk 2077 showing the Apply Profile button and profile details for a 720p Balanced configuration.
    Click Apply Profile on any Smart Profile page to automatically apply optimized settings using ZenDeck or the standalone Smart Profiles app.

    Your browser will ask if you want to open the link with an executable called ZDProtocolHandler.exe. Confirm that you want to open it.

    Browser prompt asking permission to open ZDProtocolHandler.exe from a ZenDeck Smart Profile page.
    When prompted, click Open to allow ZenDeck or the standalone Smart Profiles app to apply the selected Smart Profile automatically.

    The selected Smart Profile will then be applied automatically.

    If you are using ZenDeck

    Run ZenDeck at least once after installing it. This allows ZenDeck to scan your games and generate the required Windows configuration so Smart Profile links can be detected correctly.

    If ZenDeck is already running when you click Apply Profile, ZenDeck will show that a Smart Profile is being applied and then confirm it with a toast notification.

    ZenDeck showing a toast notification confirming that a Smart Profile was applied for Cyberpunk 2077.
    ZenDeck shows a toast notification when a Smart Profile has been applied successfully for your device.

    If ZenDeck is not running, a ZenDeck instance will start automatically, apply the profile, and save the configuration.

    When using ZenDeck, Smart Profiles can apply both:

    • In-game settings
    • Device-side configuration, such as resolution, GPU options, and other supported device settings

    The next time you launch that game through ZenDeck, the device-side configuration will be applied automatically.

    If you are using the standalone Smart Profiles app

    ⚠️ Important note about the standalone Smart Profiles app

    The standalone Smart Profiles app only applies the in-game settings included in a Smart Profile. It does not manage device-side settings such as resolution, TDP, GPU options, or any other device configuration handled by ZenDeck.

    Click Apply Profile on the Smart Profile page.

    Allow the browser to open the link with ZDProtocolHandler.exe.

    The profile will be applied automatically, and you will receive a toast notification confirming that the Smart Profile was applied.

    FeatureZenDeckSmart Profiles app
    Apply in-game settingsβœ…βœ…
    Launch gamesβœ…βŒ
    Device-side configurationβœ…βŒ
    Resolution managementβœ…βŒ
    GPU optionsβœ…βŒ
    Console-like experienceβœ…Partial

    ZenDeck is recommended for the full console-like experience
    The standalone Smart Profiles app can apply in-game settings, while ZenDeck can also handle supported device-side configuration when launching your games.

    Apply a Smart Profile manually from ZenDeck

    You can also apply a Smart Profile manually from inside ZenDeck.

    Once installed, open ZenDeck.

    To apply a Smart Profile:

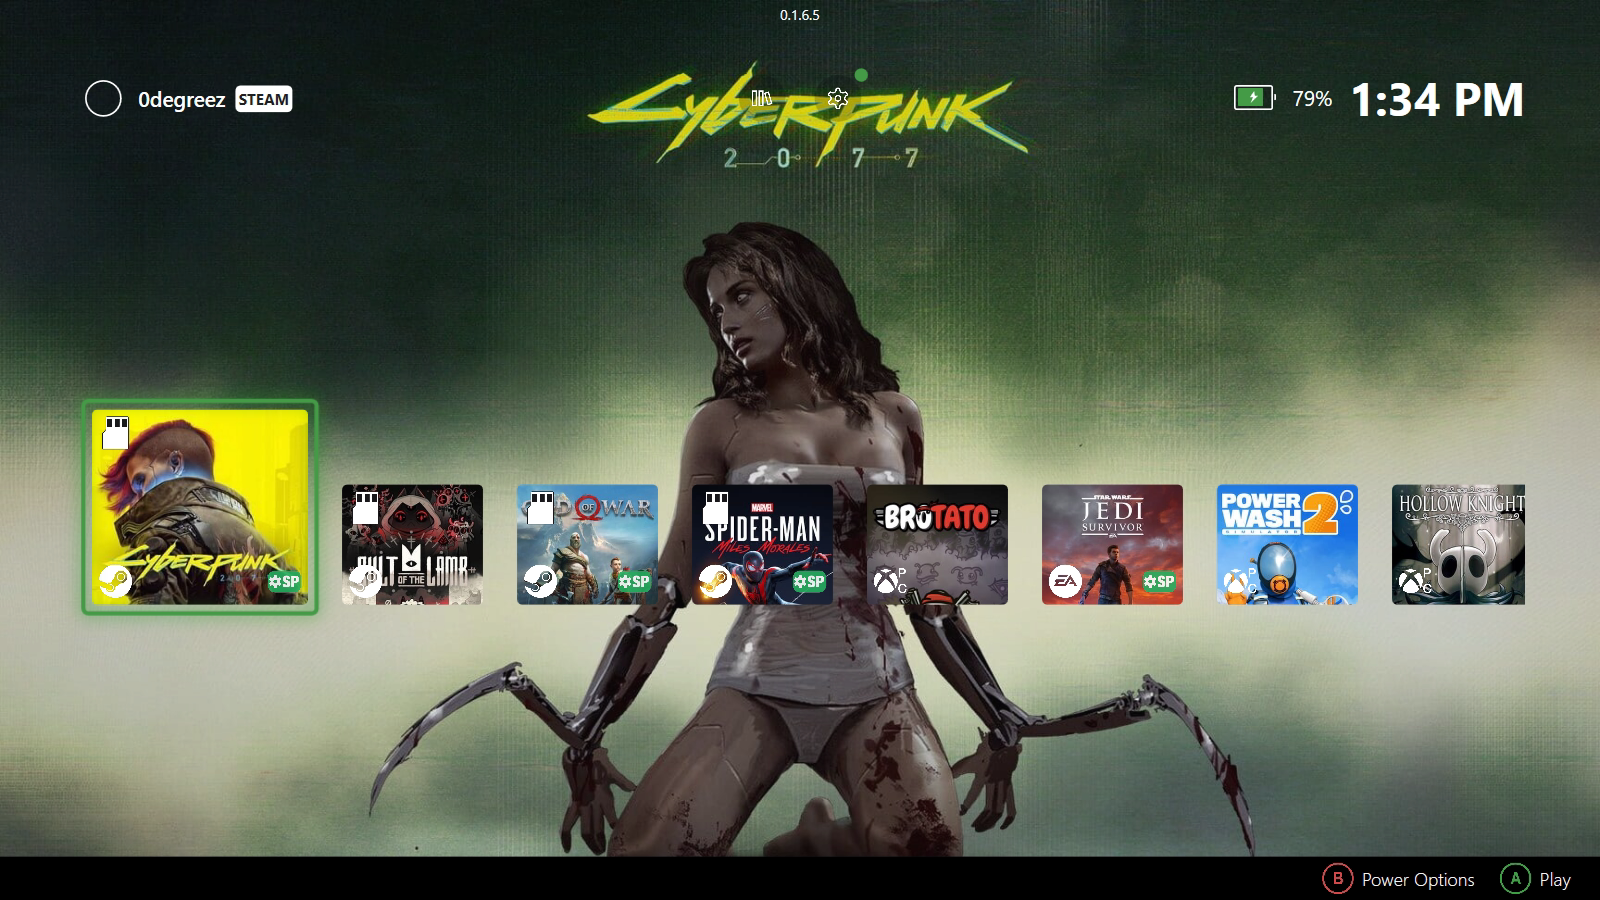
    • Select a supported game (look for the green SP badge)
    • Press A to open the game details
    • Select SMART PROFILES
    • Browse available profiles:
      • Recommended profiles are shown by default
      • Press the right bumper to switch to community profiles
    ZenDeck Smart Profiles list showing recommended and community profiles for a game on a PC handheld
    Browse recommended and community Smart Profiles and instantly apply optimized settings for your game.
    • Select a profile and press A
    • Open the profile details and press Apply Profile

    ZenDeck will automatically apply the selected configuration. Go back to the game details (press B) and press Play.

    Happy gaming!

    Want to share your own settings with the community?

    β†’ How to share a Smart Profile

  • Tutorial: How to Add a custom Startup video to your Legion Go or Windows 11 gaming device using VLC Media Player

    Update (2026): Built-in solution

    At the time, using VLC was the easiest way to add a custom boot video.
    Since then, I’ve integrated this feature directly into ZenDeck, removing the need for external tools while keeping full control over boot animations.

    This tutorial will guide you through adding a custom video to customize even more your Legion Go or Windows 11 gaming device using VLC to automatically play a video in fullscreen, stay on top of other windows and exit when finished.

    Step 1: Install VLC Media Player

    1. If you haven’t already installed VLC Media Player, download it from the official website and install it on your computer.

    Step 2: Download the Custom Video

    1. Download the custom startup video from the following link:
      Download Video
    2. Save the video to a location on your computer, such as C:\Users\YourUsername\Videos\startup_video.mp4.

    Step 3: Open the Windows Startup Folder

    1. Press Win + R to open the Run dialog box.
    2. Type shell:startup and press Enter.
      • This will open the Startup folder, where you can place shortcuts to programs or files you want to run automatically when Windows starts.

    Step 4: Create a VLC Shortcut

    1. Locate your VLC executable file:
      • By default, it is usually located at: C:\Program Files\VideoLAN\VLC\vlc.exe.
    2. Right-click the file vlc.exe and select Create Shortcut.
    3. Drag and drop the newly created shortcut into the Startup folder.

    Step 5: Edit the Shortcut Properties

    1. In the Startup folder, right-click the VLC shortcut and select Properties.
    2. In the Shortcut tab, locate the Target field.
    3. Modify the Target field to include the following command:"C:\Program Files\VideoLAN\VLC\vlc.exe" --fullscreen --video-on-top --play-and-exit --no-video-title-show "C:\path\to\video.mp4"
      • Replace C:\path\to\video.mp4 with the full path to your video file.
      • The --no-video-title-show parameter removes the title display when the video starts.
    4. Click OK to save the changes.

    Step 6: Test the Shortcut

    1. Double-click the VLC shortcut in the Startup folder to test it.
      • VLC should start, play the specified video in fullscreen mode, stay on top of other windows, and exit when the video finishes.

    Step 7: Restart Your Computer

    1. Restart your computer to confirm that VLC starts automatically and plays the video when you log in.

    Notes

    • Ensure the video file path is correct; otherwise, VLC might not open.
    • If you want to prevent VLC from playing again after the initial video, make sure the playlist settings in VLC are configured not to loop or remember the last playlist.
    • You can add additional VLC commands as needed. For more options, check VLC’s official documentation.

    By following these steps, VLC Media Player will automatically start, play your video in fullscreen, and close itself when done, every time you log in to Windows.

    Bonus Animation

    This is another animation with the text LOADING and LEGION at the beginning you can download it here.

    For more animations check the Startup Animation category.